Quick Start
This guide will take you through the basic steps of getting your Ray Console up and running. In order to set up your console you will need:
Ray Console with power supply
Mains power outlet
Internet connection (Ethernet or WiFi)
Lighting system or individual device to be controlled (5-pin DMX cable)
How to Use this Quick Start
Throughout this quick start the following conventions are used:
Colour - Buttons on the touch screen are written in bold
[Delete] - Mechanical buttons and faders are written in square brackets and in bold
Help Overlay - Dialogues on the touch screen are written in italics
Light / Colour / Picker - Locations on the touch screen are written in bold as series of buttons separated by slashes
Delivery Notice
When Ray Console arrives, please check the packaging for damage. Then unpack Ray Console and check for transport damage. If you notice any transport damage, contact the carrier or retailer immediately and make the necessary claims.
Package Contents
Your new Ray Console will be delivered with the following items. Please ensure they are all present and undamaged:
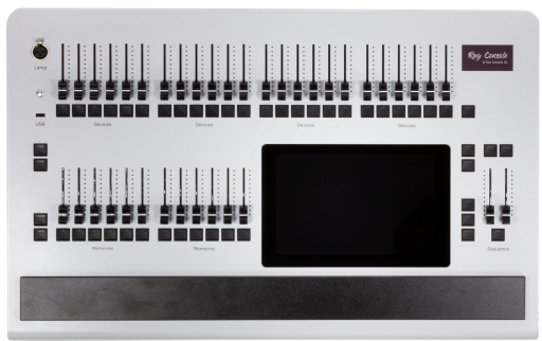
Q-Ray Console
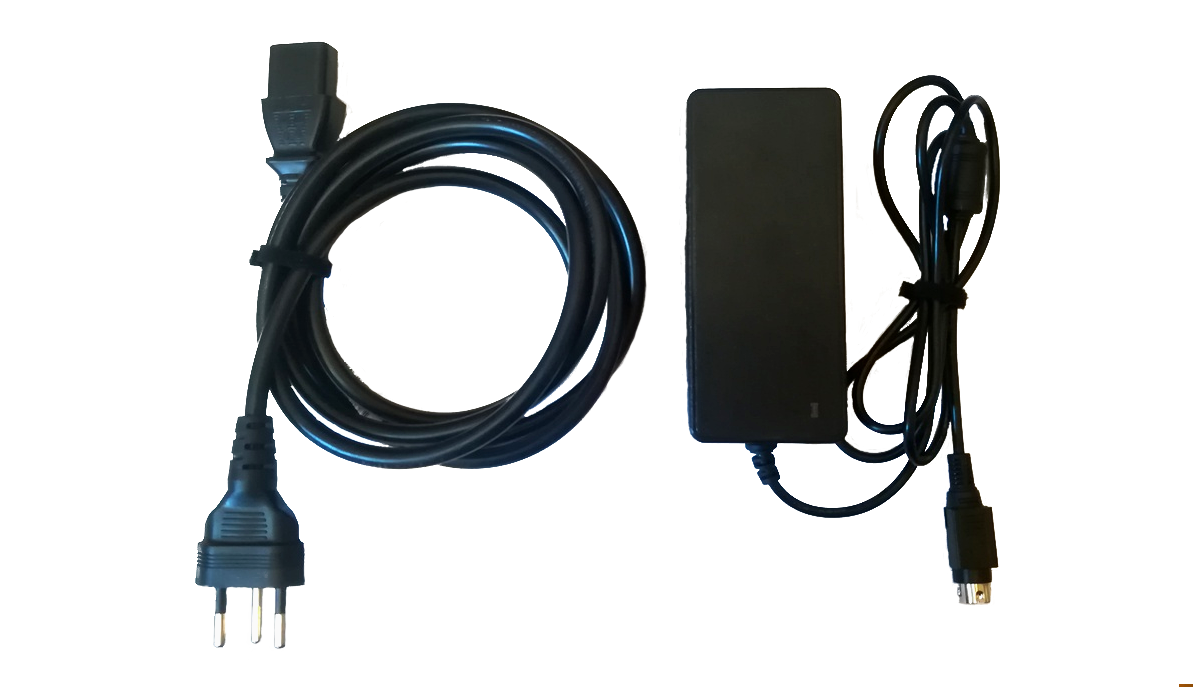
Power Supply
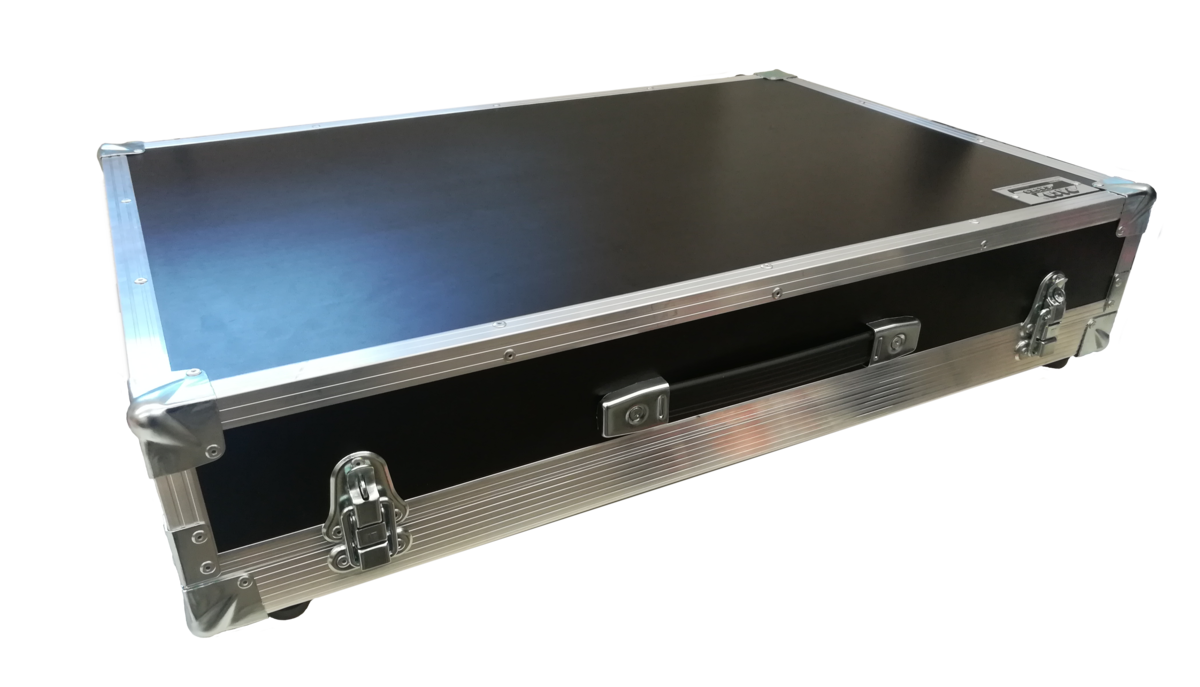
Flight Case
Desk Lamp (Littlite)
Dust Cover
Quick-Start Manual
Power Supply Warnings
The console has a universal power supply that can be operated with voltages between 100 and 240 volts in a frequency range from 50 to 60 Hz. Before connecting the power supply unit to the power supply, check that the voltage is within the specified ranges.
THIS SYSTEM MUST BE CONNECTED TO A PROTECTIVE EARTH CONDUCTOR.
Note: All connections should be made when the system components are switched off, otherwise system components could be damaged.
Hardware Setup
Please set up your console hardware as follows:
- Place Ray Console on a flat, smooth, stable surface like a table
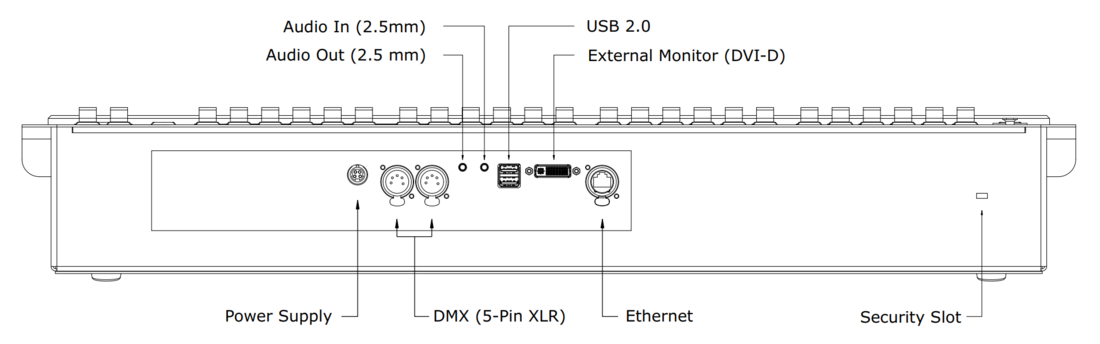
- Make sure you can reach the connectors at the back of the console
- Next connect the power supply to the mains power supply
- Connect the power supply to the console (12V DC 5.0 A)
- Connect the DMX cable from your system, dimmer or individual device to DMX 1
Power Up Console
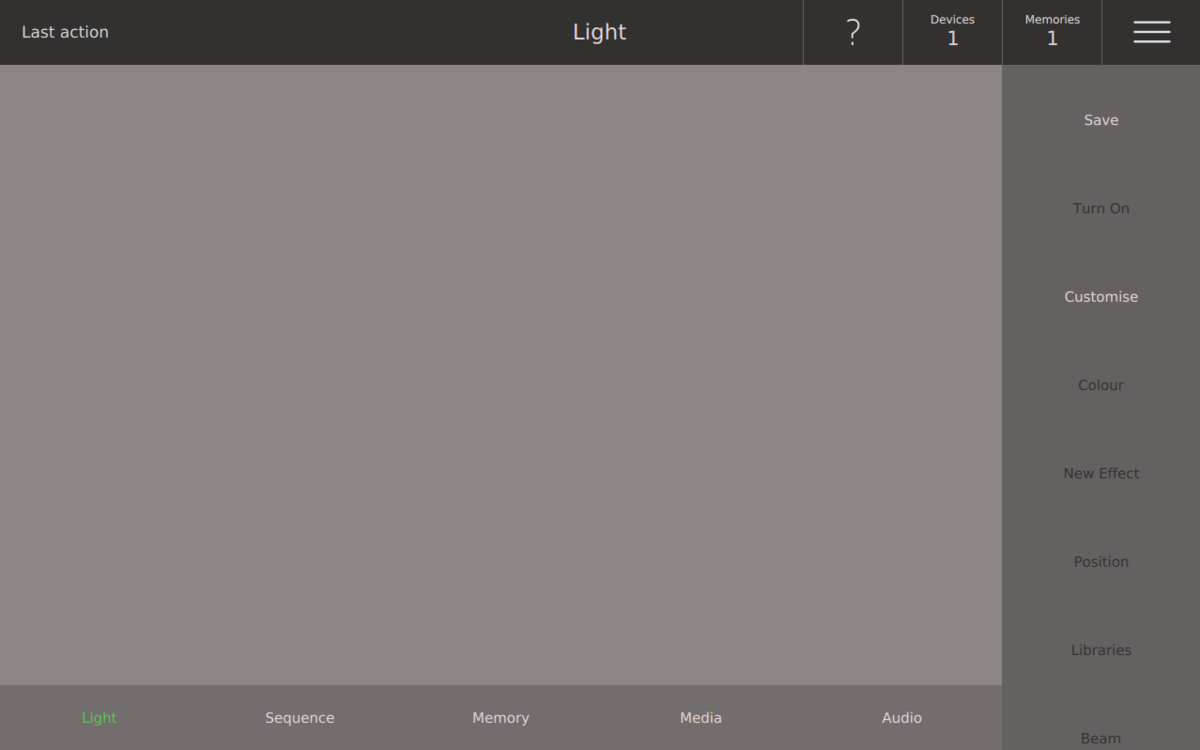
Your Ray Console should now be ready to power on. The power button on the top left hand side of the console should blink on and off. Press the power button until all the buttons light up. Various screens will be shown during startup. The console is fully powered up when the following screen is shown:
Internet Connection
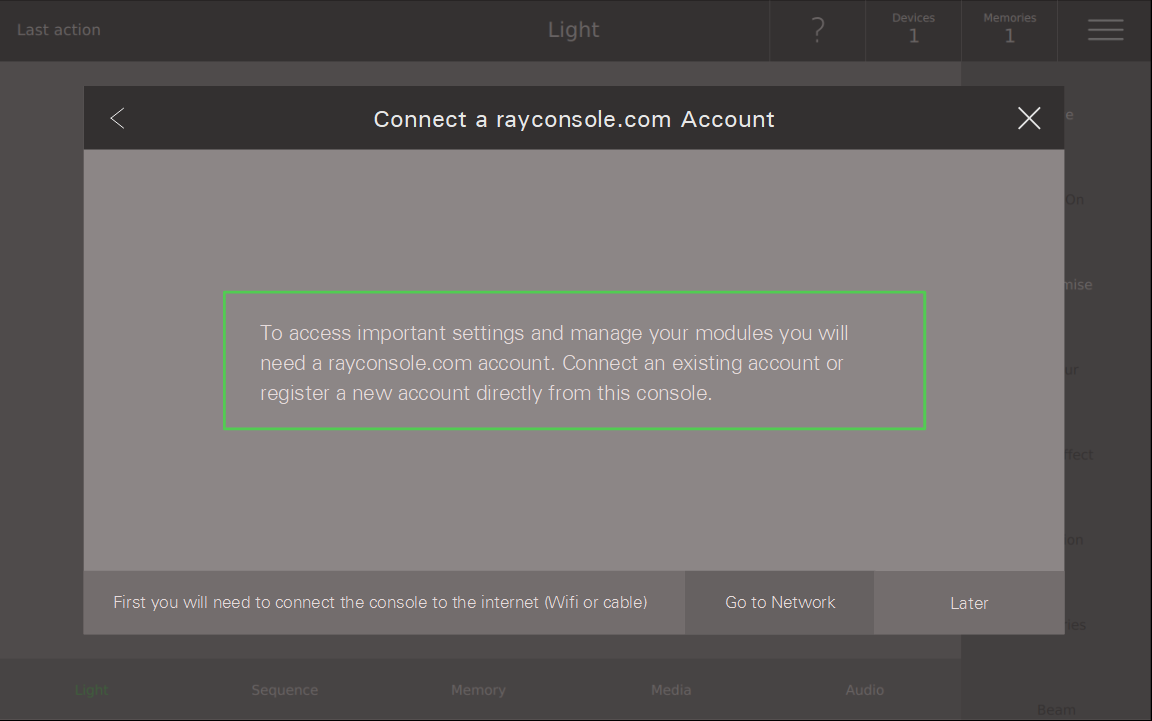
If you are not connected to the internet when starting up or while creating or connecting your customer account, you will be notified to go to the Network dialogue by pressing Go to Network. One solution is to connect a physical Ethernet cable to the console. Alternatively select Go to Network and then select WiFi and then select a network from the list, enter your network password and connect. Once connected sign into your account as shown below.
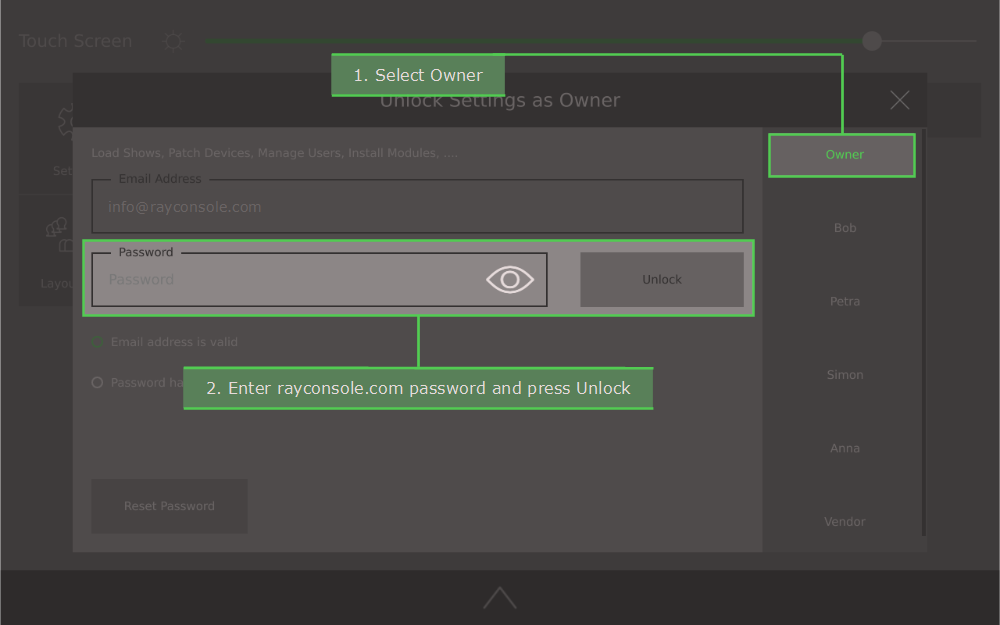
Connecting to your Customer Account
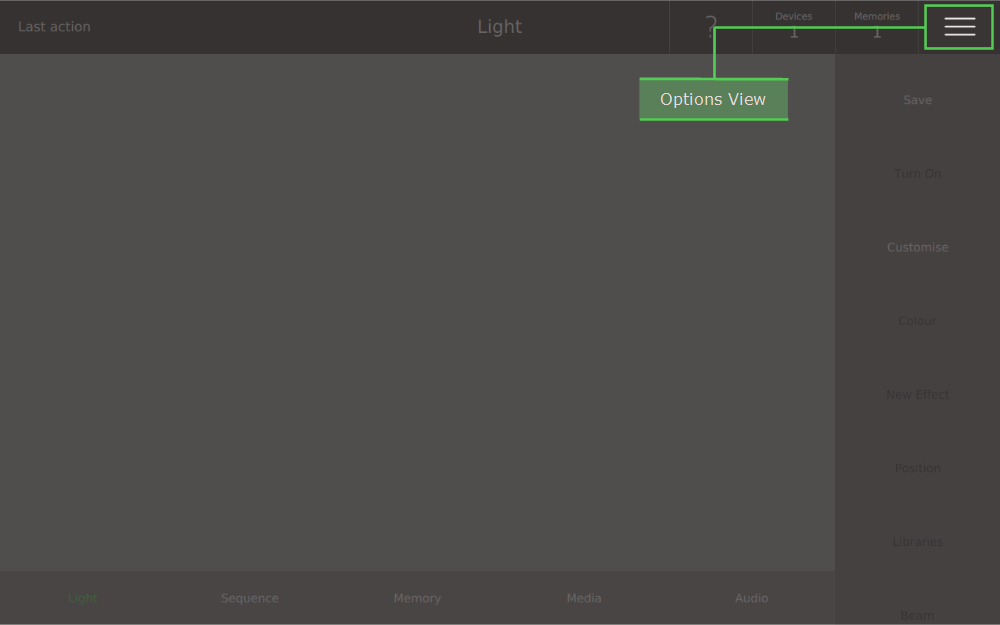
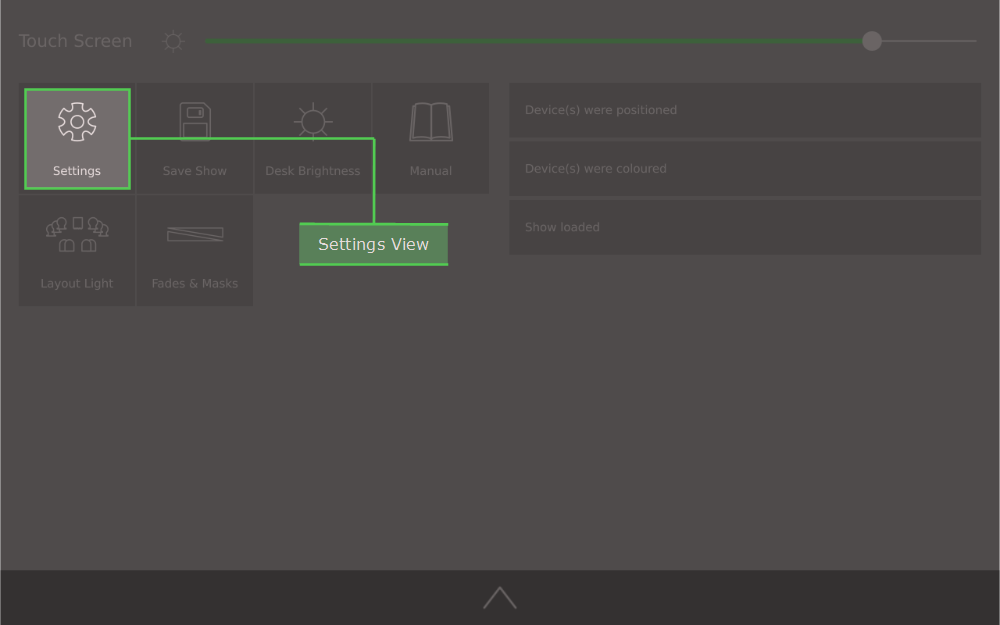
To access the console settings you need to connect or create a customer account. Select the three lines on the top left to go to Options View then select the Settings button. You should then see the Sign In dialgoue. If you already have a rayconsole.com customer account, sign in with your email address and password.
Creating an Account
If you do not have a rayconsole.com account simply select the Register button on the bottom right. You will then be able to register a new rayconsole.com account directly on the console. Your rayconsole.com account allows you to manage all your consoles and their modules in one place.
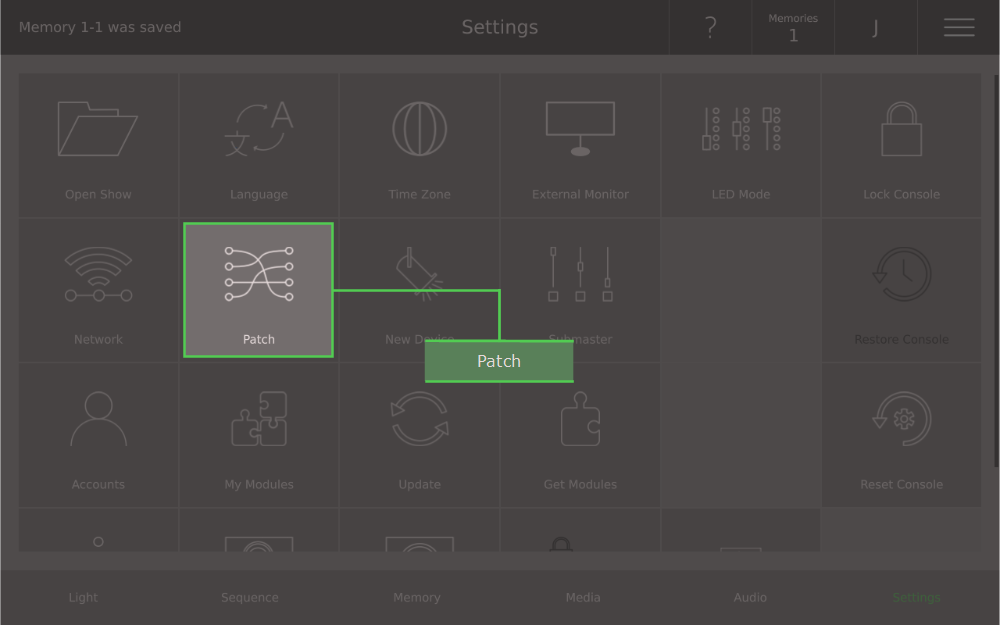
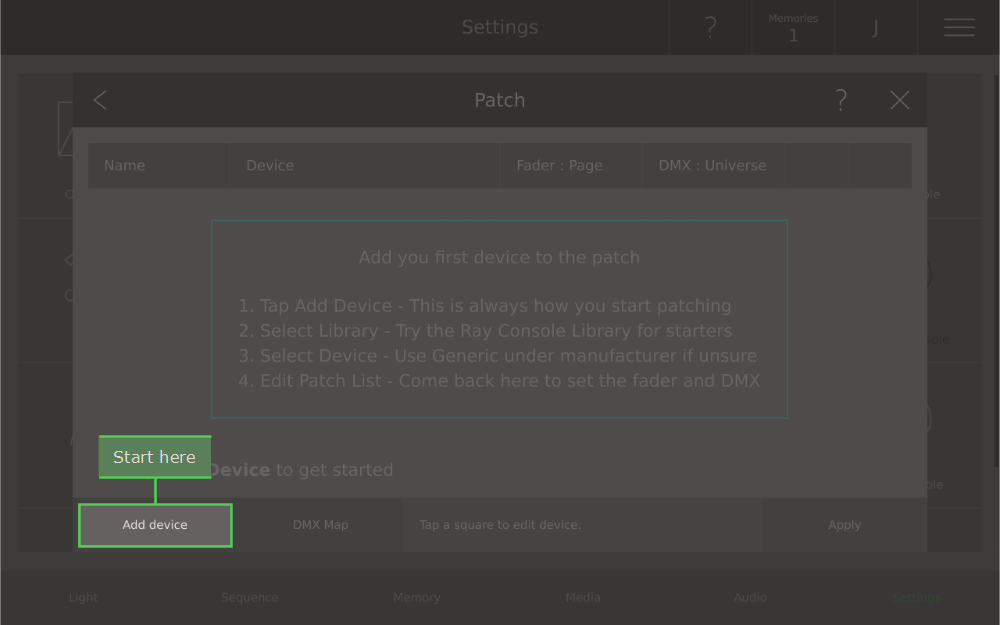
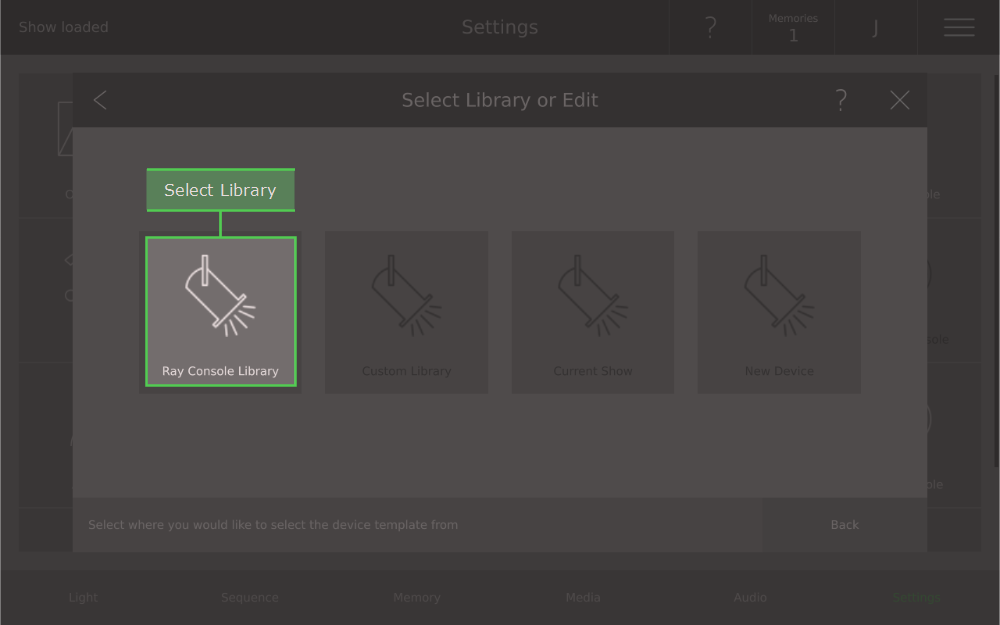
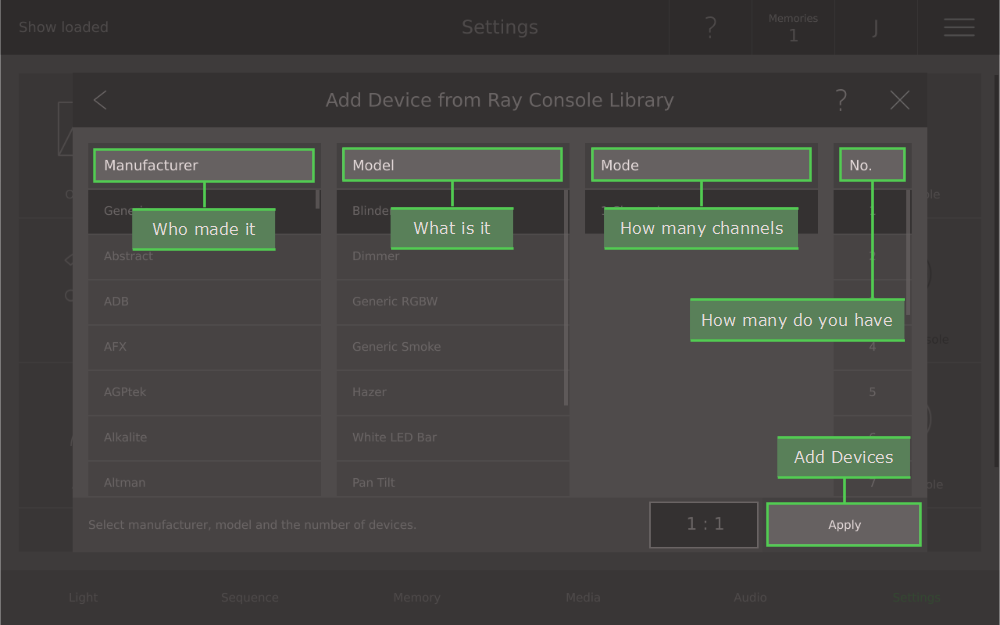
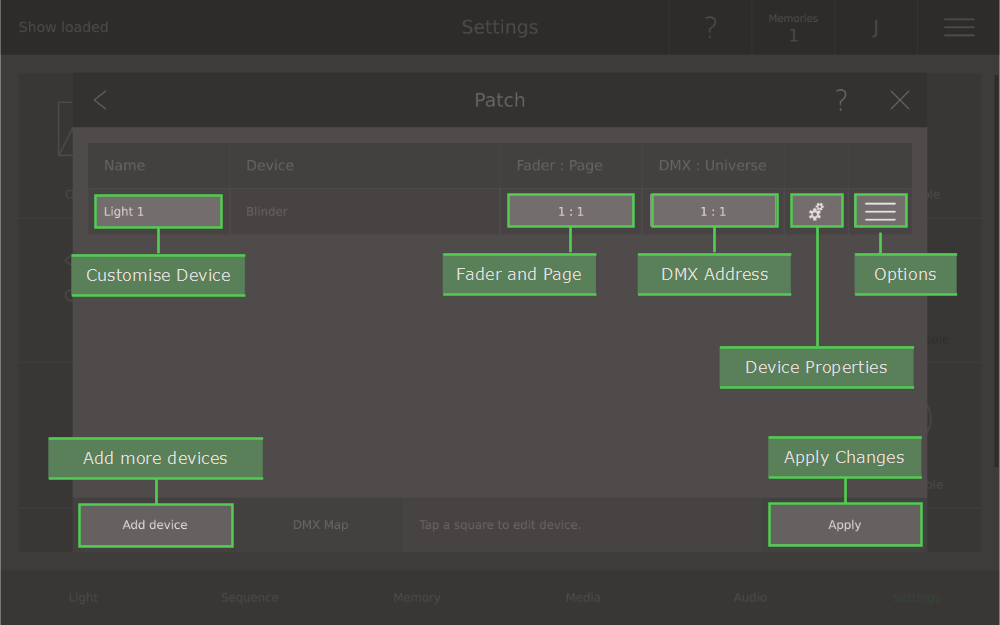
Patching
To control devices the console needs to know which devices are addressed on the DMX system. The process of patching a device is shown below. If you are using a dimmer, just select Generic / PAR / Normal devices and patch the number of circuits you have. You can read more about patching in the Patch section of the manual.
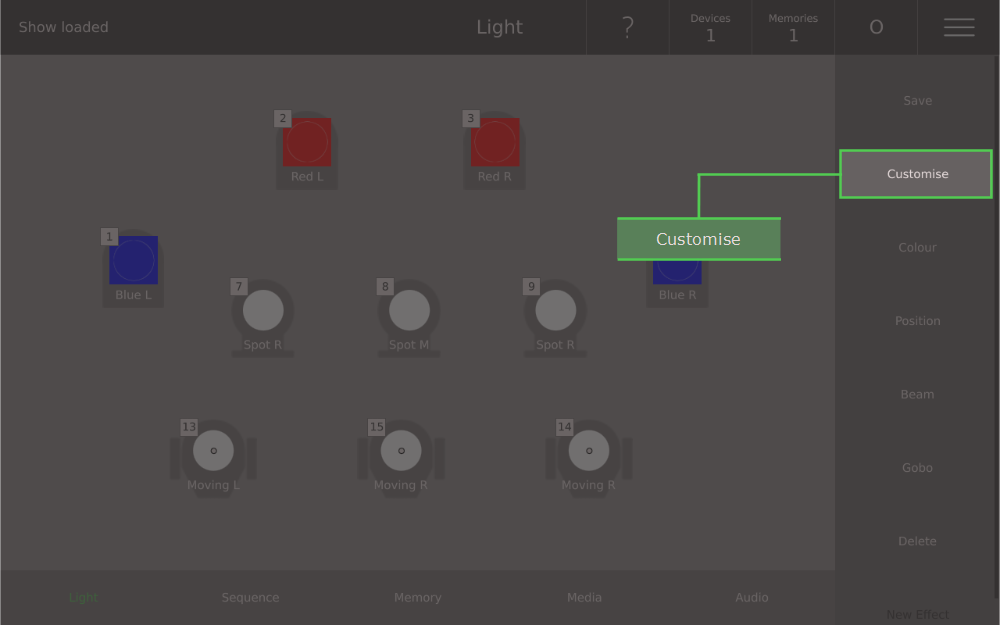
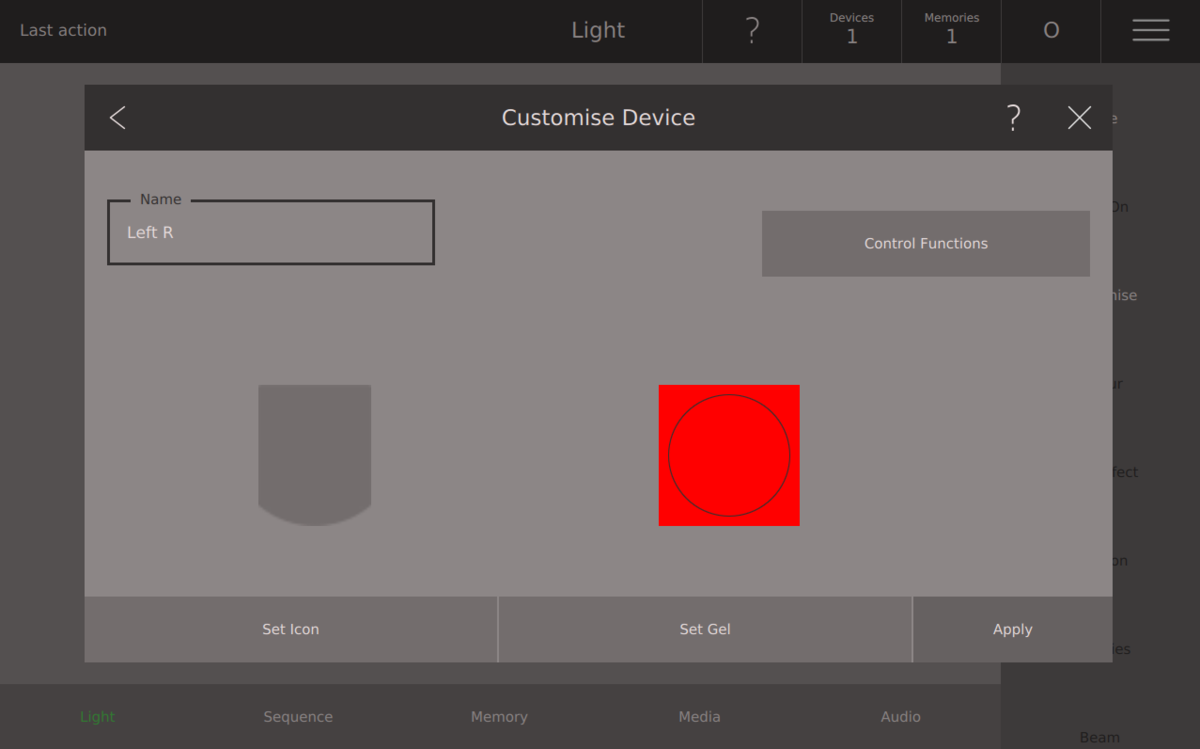
Customise Devices
You can customise how each device looks on the Light View (we call this the Device Symbol) with a name, icon and gel. Customising the Device Symbol helps you quickly and easily find devices on the LightView. Swipe down from the top to go to Options / Light Layout to change how the Device Symbols are positioned on the Light View.
Name - The name is shown on the Device Symbol and helps you identify the device
Icon - This is the shape of background of the Device Symbol
Gel - If the device has a physical gel on it, this can be shown on the Device Symbol

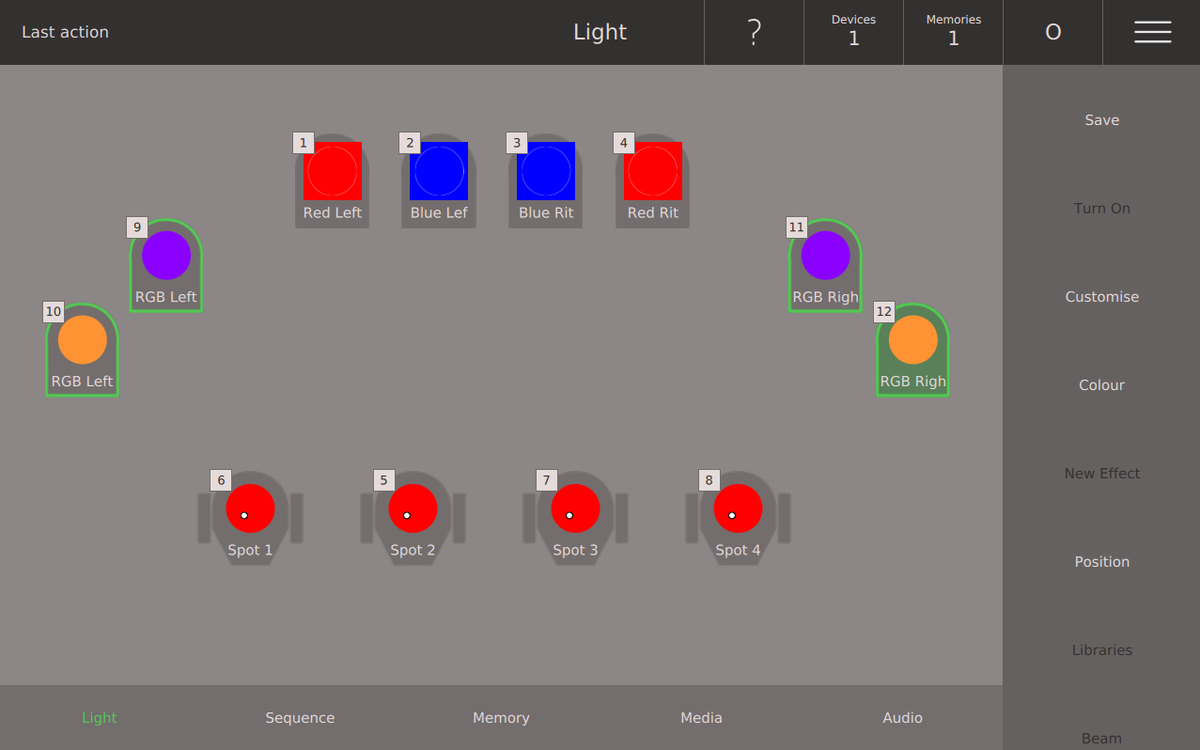
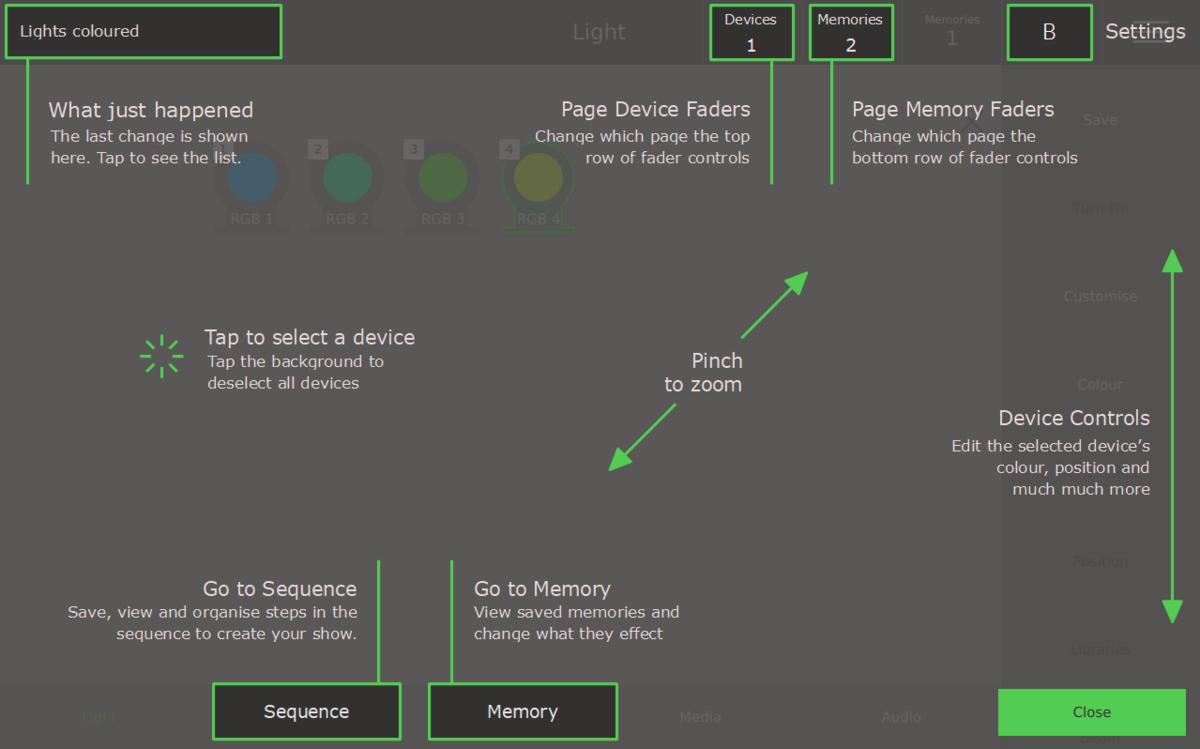
Controlling Devices
Intensity
The intensity of a device is controlled by the respective [Device Fader] (top row of faders). The Device Symbols on the Light View shows the fader number in the top left hand corner. Move the respective fader to change the device intensity and see the Device Symbol update on the Light View.
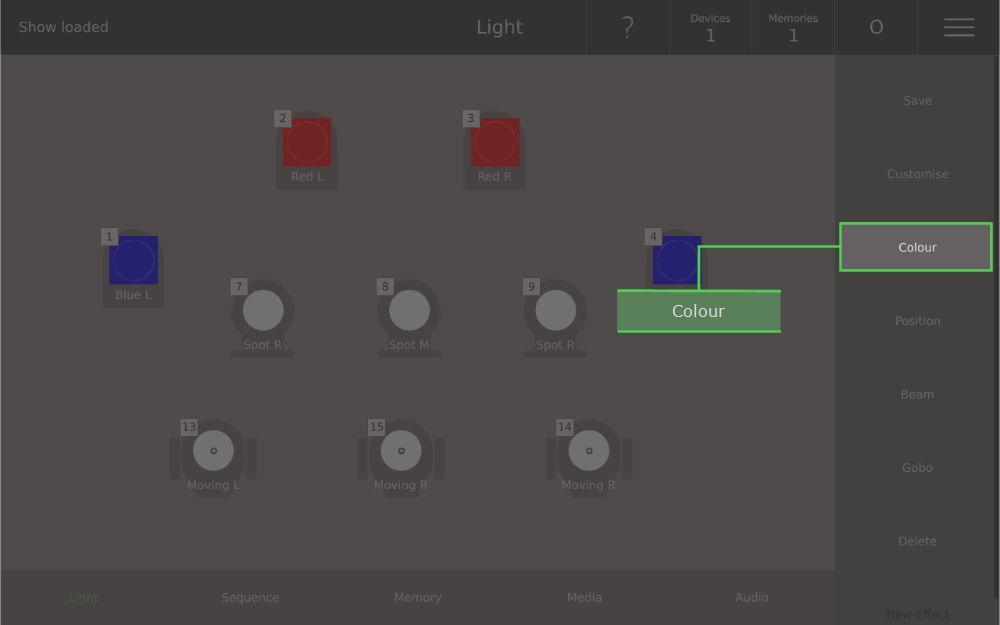
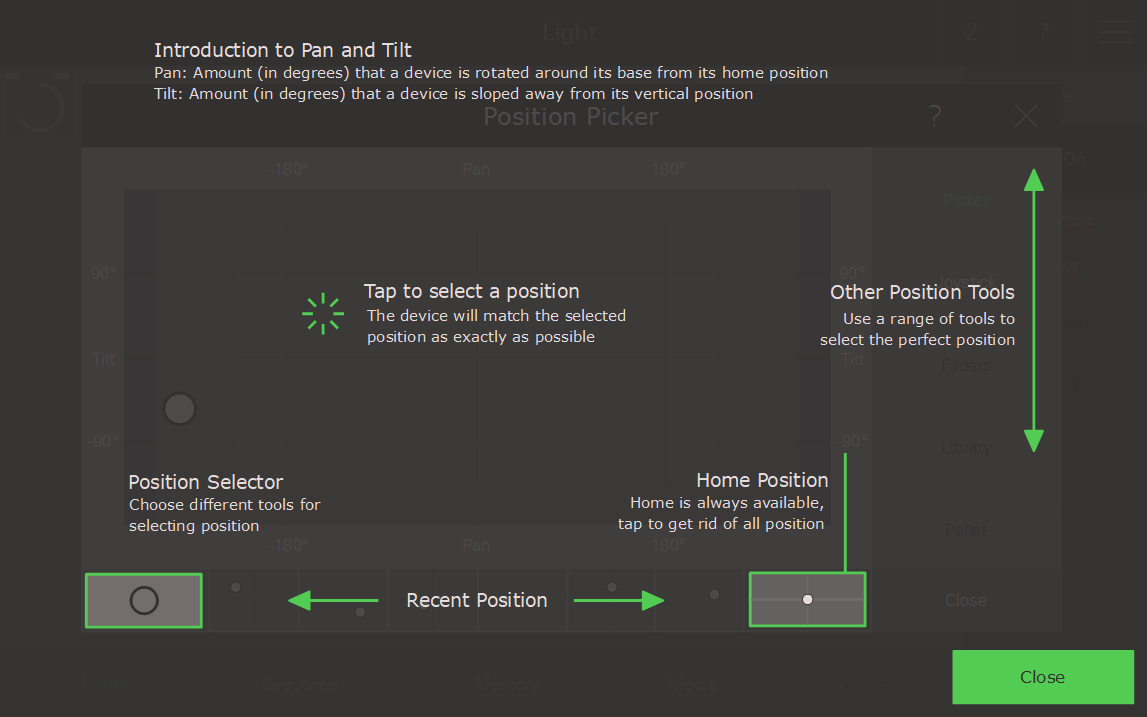
Colour, Position, Beam and Gobo
To change the attributes Colour, Position, Beam or Gobo of a device first select the device by tapping the Device Symbol on the Light View. Next tap an attribute (Colour, Position, Beam or Gobo) on the right hand side of the Light View and use the dialogue screen that appears to control attribute. Note: Colour, Position, Beam and Gobo require the respective module in order to be controlled.
Clear
If you want to clear the colour, position, beam or gobo on more or one devices. Select the Device Symbols and press the [Delete] button.
Save a Memory or Sequence Step
To save a memory or sequence step simply press the [Save] button and then the location you wish to save to e.g. [A], [B] or [Seq]. This can also be done using the touch screen by selecting the Save button in Light View and then selecting the location on the dialogue that appears.
Play a Memory or Sequence Step
To play a memory, simply move the memory fader (where you previously saved a memory) up to the top. To play a sequence step either press the [Seq] button or move both faders above the [Seq] button to the other end. We recommend selecting the Sequence View to see which sequence step is currently playing. To make sure you are only seeing what is saved on a memory or sequence step, please move all faders on the top row down to the zero and press the [Free] button twice.

Sequence View
Select the Sequence View by taping Sequence at the bottom of the screen. On the Sequence View each step has a name and a number. The current step is highlighted with green, the next step is highlighted with white and the next next step is highlighted with blue. The current fade is shown by an indicator on the current step and next step.
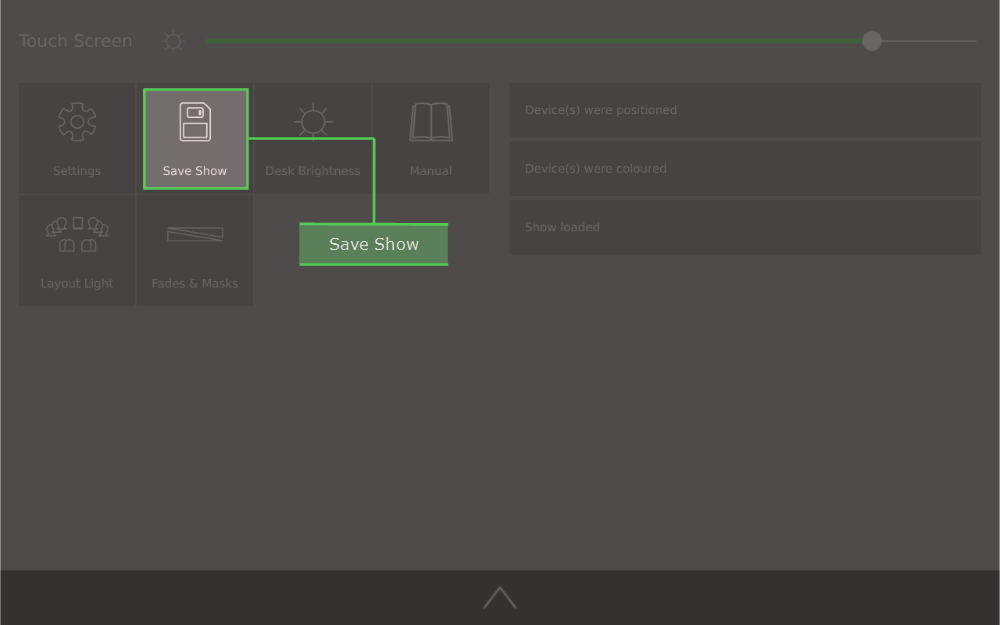
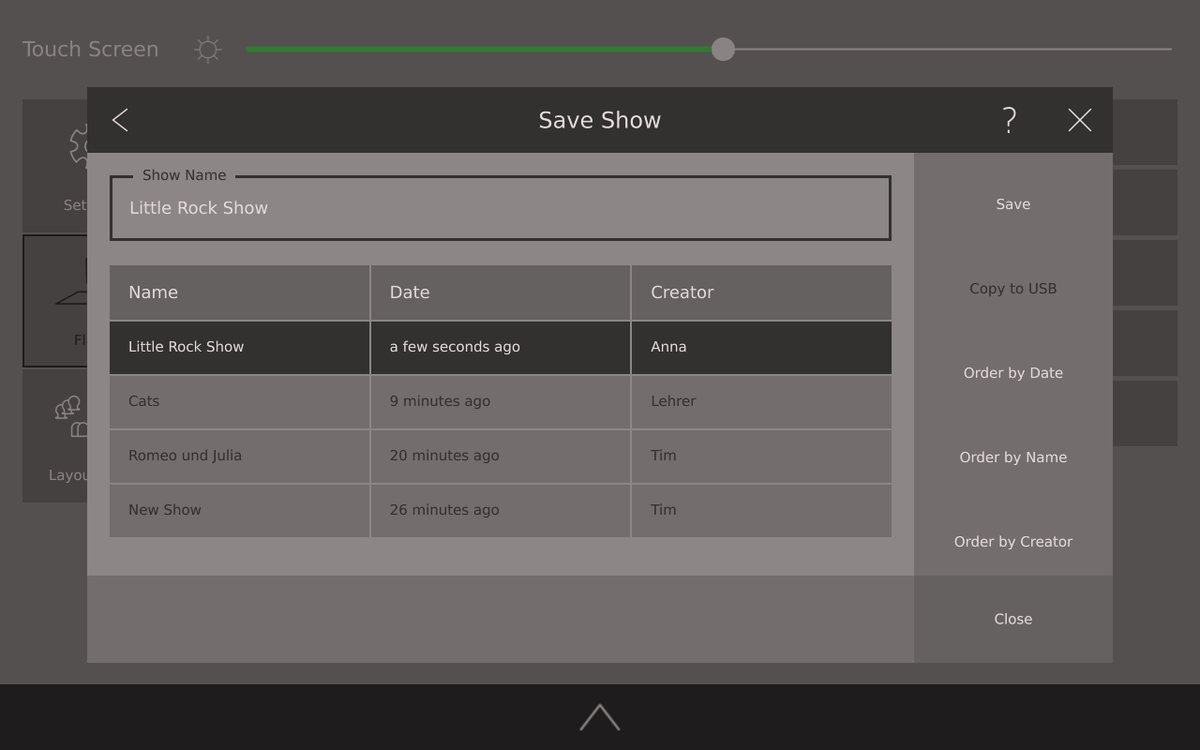
Save a Show
To save any changes made to your show, go to Options /Save Show and finally select Save. To create a new saved show, go to Options /Save Show, enter a Show Name and select Save.
Context Help
In Ray Console we put the help exactly where you need it. Press the question mark ? on screen or the [Help] button to view context specific help. The question mark is in the top right hand corner of every view (if a help topic is available).
The language of the context help can be changed in Options / Settings / Language (subject to availablity and module purchases/subscriptions).
Warnings
TO AVOID THE RISK OF ELECTRIC SHOCK, DO NOT OPEN THE CONSOLE. THERE ARE NO USER-REPLACEABLE PARTS IN THE CONSOLE. THE CONSOLE MUST ALWAYS BE SERVICED BY AN EXPERT DURING MAINTENANCE WORK. ALWAYS DISCONNECT FROM THE POWER SOURCE BEFORE OPENING.
WARNING! CHOKING HAZARD
Small parts. Not for children under 3 years.